Are you interested in setting up a remote desktop environment on your Raspberry Pi using Ubuntu and VNC? This comprehensive guide will walk you through the process step by step, ensuring a smooth and efficient setup. We’ll delve into the basics of Raspberry Pi and Ubuntu, explore the functionalities of VNC, and provide detailed instructions for configuring your system for seamless remote access. Regardless of your skill level, this article aims to equip you with the knowledge and tools necessary to achieve your goal.
Raspberry Pi has emerged as a go-to choice for enthusiasts, developers, and hobbyists due to its affordability and versatility. Pairing it with Ubuntu, one of the most robust and user-friendly Linux distributions, amplifies its capabilities. Incorporating VNC (Virtual Network Computing) into this setup enables you to access your Raspberry Pi remotely, granting you the flexibility to work from virtually anywhere.
Throughout this article, we’ll examine the advantages of using Raspberry Pi with Ubuntu and VNC, provide a detailed setup guide, and address common issues with practical troubleshooting tips. By the end of this guide, you’ll possess a thorough understanding of how to configure and manage your Raspberry Pi remotely via VNC.
- Maine Cabin Masters Jedi
- The Tides Monterey Ca
- La Catrina Mexican Grill
- Quality Inn Hotel Ocean City Md
- Cinema World In Melbourne
Table of Contents
- Introduction to Raspberry Pi
- Ubuntu on Raspberry Pi
- What is VNC?
- Benefits of Using Raspberry Pi with Ubuntu and VNC
- Step-by-Step Guide to Setting Up VNC on Raspberry Pi
- Troubleshooting Common Issues
- Optimizing VNC Performance
- Security Considerations
- Alternatives to VNC
- Conclusion and Next Steps
Understanding Raspberry Pi
The Raspberry Pi is a compact, budget-friendly single-board computer developed by the Raspberry Pi Foundation. Initially conceived to promote programming and computer science education in schools, it has since captured the interest of hobbyists and professionals worldwide. This versatile device is capable of performing a wide array of tasks, ranging from media center operation to web server hosting.
Key Features of Raspberry Pi
- Compact design with minimal power consumption
- Compatibility with multiple operating systems, including popular Linux distributions like Ubuntu
- Equipped with GPIO pins for hardware interfacing
- Highly customizable and adaptable to various projects
Thanks to its small size and robust capabilities, the Raspberry Pi serves as an excellent platform for experimenting with cutting-edge technologies, including remote desktop solutions such as VNC.
Ubuntu on Raspberry Pi: A Powerful Combination
Ubuntu, a widely acclaimed Linux distribution known for its stability and user-friendliness, can be seamlessly installed on the Raspberry Pi. By running Ubuntu on your Raspberry Pi, you gain access to its extensive software repository and robust community support. This pairing makes it an ideal choice for setting up a remote desktop environment using VNC.
- Nate Robinson Draft Pick
- Hilton Hotels On Duvaltreet Key West
- Amc Independence Commons 20 Theater
- Joe Biden Political Career
- Elements Tableong
Advantages of Using Ubuntu on Raspberry Pi
- Access to a vast array of applications and tools
- Regular updates and security patches to ensure optimal performance
- Strong community support and comprehensive documentation for troubleshooting
- Compatibility with various hardware peripherals, enhancing functionality
Installing Ubuntu on Raspberry Pi is straightforward and can be accomplished using the Raspberry Pi Imager tool. Once installed, configuring VNC for remote access becomes a seamless process.
Exploring VNC: A Graphical Desktop Sharing Solution
VNC (Virtual Network Computing) is a powerful graphical desktop sharing system that enables you to remotely control another computer. By transmitting keyboard and mouse events from one machine to another, VNC allows users to interact with the remote system as if they were physically present. Widely adopted for remote administration, troubleshooting, and accessing files and applications from a distance, VNC has become an indispensable tool for many professionals.
How VNC Functions
VNC operates by establishing a server-client relationship between two machines. The server represents the machine being accessed remotely, while the client refers to the device used to connect to the server. Upon connecting to a VNC server, you receive a live feed of the server’s desktop, empowering you to control it remotely.
VNC’s platform independence is one of its standout features. It allows you to connect to a VNC server running on any operating system from a client operating on another, making it an exceptionally flexible solution for remote access across diverse devices and platforms.
Advantages of Using Raspberry Pi with Ubuntu and VNC
The combination of Raspberry Pi, Ubuntu, and VNC offers numerous benefits, making it a compelling choice for remote computing:
- Cost-Effective: The affordability of Raspberry Pi makes it an economical solution for setting up a remote desktop environment.
- Energy-Efficient: The device’s low power consumption ensures minimal energy usage, even when operating continuously.
- Flexible: With Ubuntu, you gain access to a wide range of applications and tools, expanding the functionality of your Raspberry Pi.
- Remote Accessibility: VNC enables you to access your Raspberry Pi from any location, providing unparalleled convenience and flexibility.
These advantages make the Raspberry Pi Ubuntu VNC setup an appealing option for both personal and professional applications.
Comprehensive Guide to Setting Up VNC on Raspberry Pi
Step 1: Installing Ubuntu on Raspberry Pi
Before proceeding with VNC setup, you need to install Ubuntu on your Raspberry Pi. Follow these steps to get started:
- Download the latest version of Ubuntu Server for Raspberry Pi from the official website.
- Utilize the Raspberry Pi Imager tool to write the Ubuntu image to an SD card.
- Insert the prepared SD card into your Raspberry Pi and power it on.
- Follow the on-screen instructions to complete the installation process.
Step 2: Installing the VNC Server
Once Ubuntu is successfully installed, you can move forward with installing the VNC server:
- Open a terminal window on your Raspberry Pi.
- Execute the following command to update your package list:
sudo apt update. - Install the VNC server by running the command:
sudo apt install realvnc-vnc-server.
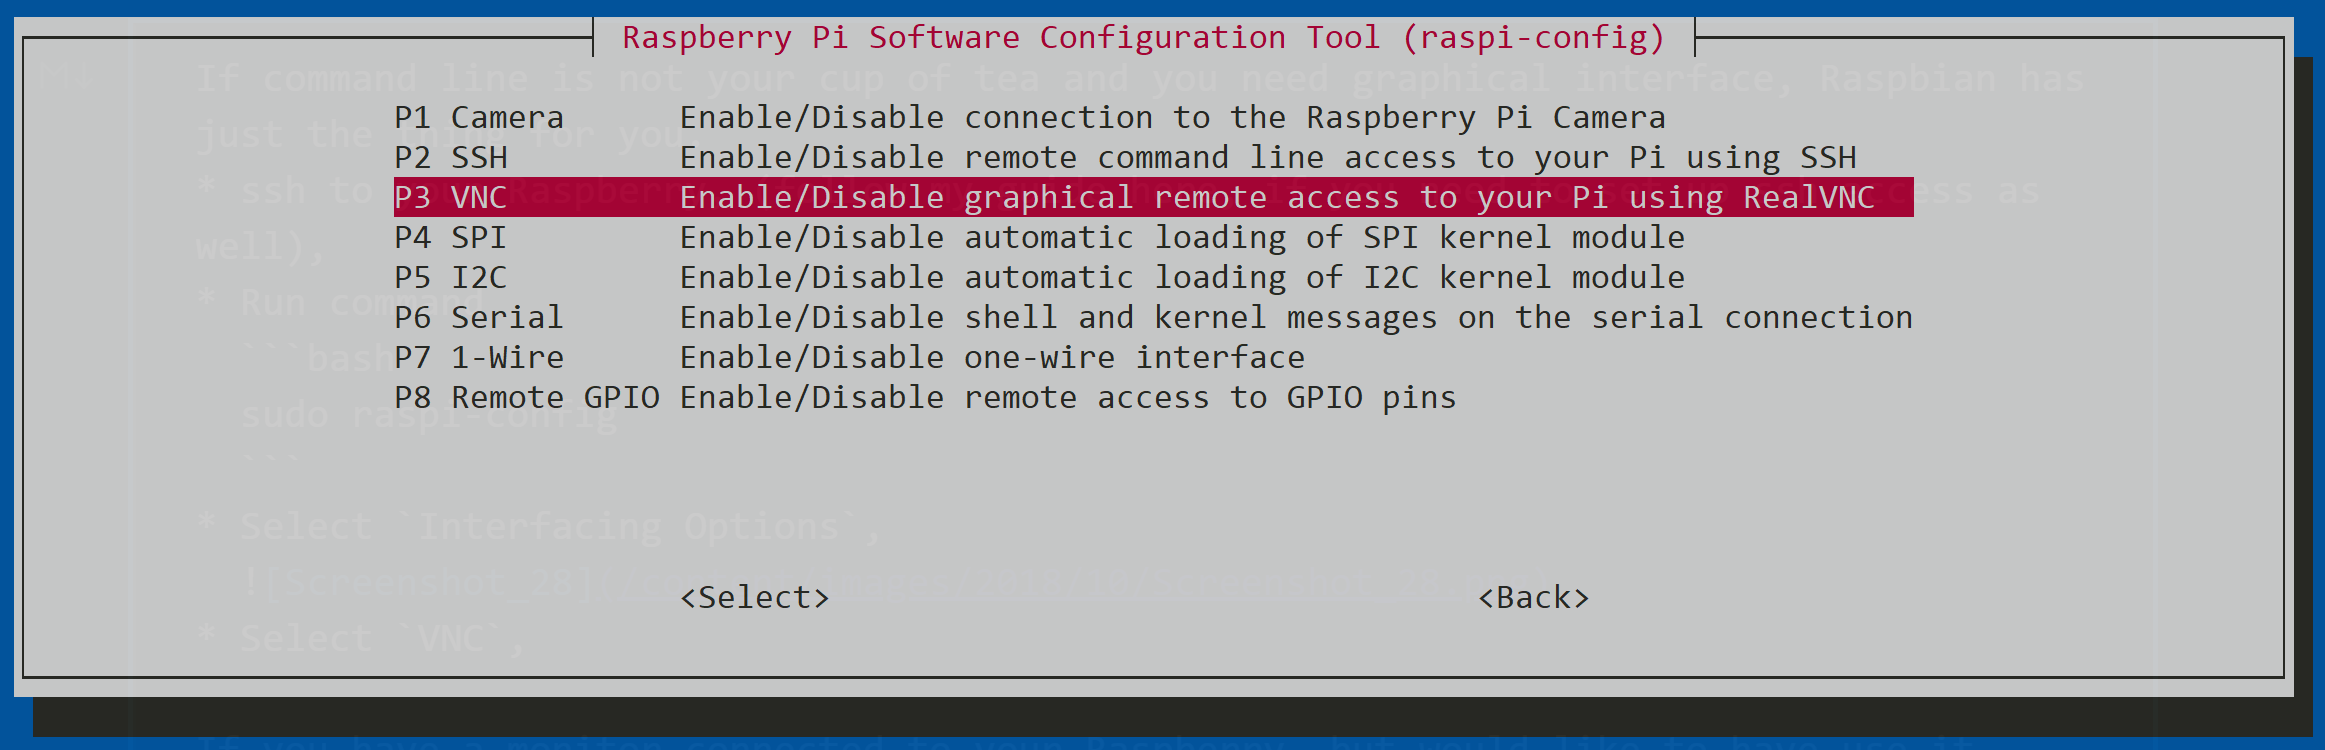
Step 3: Configuring the VNC Server
After installing the VNC server, you need to configure it for optimal performance:
- Run the command
vncserverto initiate the VNC server. - Set a secure password for VNC access when prompted.
- Select the desired display resolution and color depth based on your preferences.
Step 4: Connecting to the VNC Server
Finally, establish a connection to your Raspberry Pi using a VNC client:
- Download and install a VNC client on your computer.
- Input the IP address of your Raspberry Pi into the VNC client.
- Log in using the password you established earlier.
Upon completing these steps, you’ll have a fully functional Raspberry Pi Ubuntu VNC setup ready for use.
Addressing Common Issues
Although setting up VNC on Raspberry Pi is typically a straightforward process, you may encounter some challenges. Below are some common issues and their respective solutions:
- Connection Refused: Verify that the VNC server is active and that the IP address and port number are accurate.
- Authentication Failed: Recheck the password to ensure it matches the one configured during the VNC server setup.
- Slow Performance: Optimize VNC settings by reducing the display resolution and color depth.
Resolving these issues ensures a seamless VNC experience on your Raspberry Pi.
Enhancing VNC Performance
To elevate the performance of VNC on your Raspberry Pi, consider implementing the following strategies:
- Utilize a wired Ethernet connection instead of Wi-Fi for enhanced stability and speed.
- Adjust VNC settings to employ a lower resolution and fewer colors when bandwidth is limited.
- Activate compression to minimize the volume of data transmitted between the server and client.
These optimizations can significantly improve the responsiveness and reliability of your VNC connection.
Prioritizing Security
When utilizing VNC for remote access, prioritizing security is crucial to safeguard your Raspberry Pi from unauthorized access:
- Employ strong, unique passwords for VNC authentication.
- Enable encryption to secure the data transmitted between the server and client.
- Restrict access to trusted IP addresses by implementing firewall rules.
Implementing these security measures helps protect your Raspberry Pi and ensures a secure VNC connection.
Exploring Alternatives to VNC
While VNC remains a popular choice for remote desktop access, several alternatives are worth considering:
- SSH (Secure Shell): Ideal for command-line access to your Raspberry Pi, offering enhanced security features.
- TeamViewer: A user-friendly remote access solution that includes additional functionalities such as file transfer.
- NoMachine: Provides high-performance remote desktop capabilities with low latency, making it suitable for demanding tasks.
Each alternative has its unique strengths and weaknesses, so choose the one that aligns best with your specific needs.
Conclusion and Future Steps
This comprehensive guide has explored the world of Raspberry Pi Ubuntu VNC, covering setup, optimization, and security considerations. By adhering to the steps outlined in this article, you can successfully configure and manage your Raspberry Pi remotely using VNC.
As a next step, consider exploring advanced configurations and customizations to further enhance your Raspberry Pi setup. Additionally, stay informed about the latest developments in Raspberry Pi, Ubuntu, and VNC to maximize your remote computing experience.
We encourage you to share your thoughts, experiences, and feedback in the comments section below. Feel free to pose questions or suggest topics for future articles. Together, let’s continue to uncover the limitless potential of Raspberry Pi and remote computing!
Data sources: Raspberry Pi Foundation, Ubuntu, RealVNC.


Detail Author:
- Name : Marlon Rippin
- Username : ron.lebsack
- Email : kschimmel@hotmail.com
- Birthdate : 1979-05-21
- Address : 91465 Neil Brook Apt. 946 Raynorshire, DE 96506
- Phone : +1-480-582-1919
- Company : Stroman Ltd
- Job : Archivist
- Bio : Earum odit recusandae aut reprehenderit. Odit velit ex velit voluptatem tempore id. Quo quia sequi ipsum. Eius sunt sint eveniet voluptatem aut nemo ea sed.
Socials
linkedin:
- url : https://linkedin.com/in/reicherte
- username : reicherte
- bio : Nostrum qui dolores voluptate ut.
- followers : 2593
- following : 1616
facebook:
- url : https://facebook.com/elinor_reichert
- username : elinor_reichert
- bio : In labore nihil sapiente. Dolores ad qui omnis inventore deleniti repudiandae.
- followers : 5880
- following : 460
