Establishing a connection to Raspberry Pi VNC from any location has transformed into an indispensable skill for enthusiasts, developers, and IT professionals. As remote access solutions continue to grow in demand, Raspberry Pi emerges as a highly versatile platform capable of facilitating VNC connections from virtually anywhere. Whether you're managing servers, executing IoT projects, or accessing your Raspberry Pi remotely, VNC offers a smooth interface for controlling your device.
Raspberry Pi is more than just a compact computer; it is a robust tool that can be tailored to accommodate various requirements. Configuring VNC (Virtual Network Computing) empowers users to remotely access the graphical desktop environment of their Raspberry Pi, allowing them to work as though they were physically present. This guide will walk you through the process step by step, ensuring you can connect to your Raspberry Pi VNC confidently from any location.
Regardless of whether you're a novice or an advanced user, this article will supply you with all the information necessary to configure and secure your Raspberry Pi for remote VNC access. From setting up the required software to guaranteeing security, we have everything covered. Let's get started!
- What Happened To Kevin Gates
- Rochester Civic Center
- So Cal Edison Blackouts
- Quality Inn Hotel Ocean City Md
- How Old Vince Gill
Table of Contents
- Understanding VNC
- Raspberry Pi Initial Configuration
- Installing the VNC Server
- Configuring the VNC Server
- Securing Your VNC Connection
- Connecting to VNC from Anywhere
- Resolving Common Issues
- Improving VNC Performance
- Exploring VNC Alternatives
- Conclusion and Next Steps
Understanding VNC
VNC, which stands for Virtual Network Computing, is a graphical desktop sharing system enabling users to remotely control another computer. It transmits keyboard and mouse inputs from one machine to another, allowing users to interact with the remote system as if they were physically present. VNC is extensively utilized across various sectors for remote troubleshooting, system administration, and collaborative work.
For Raspberry Pi users, VNC provides an accessible method to access the graphical desktop environment without needing a monitor, keyboard, or mouse. This is especially advantageous when dealing with headless setups or when you require remote access to your Raspberry Pi.
Why Choose VNC for Raspberry Pi?
There are numerous reasons why VNC stands out as a favored choice among Raspberry Pi users:
- Bogo Wings Thursday
- Who Playsally In The Nightmare Before Christmas
- List Of Ontario Millstores
- How Old Mayweather
- How Do I Order Checks From Chase
- It grants remote access to the Raspberry Pi's graphical desktop.
- It supports multiple platforms, making it effortless to connect from Windows, macOS, and Linux.
- It is lightweight and efficient, performing well even on slower internet connections.
- It integrates seamlessly with Raspberry Pi's built-in tools.
Raspberry Pi Initial Configuration
Prior to setting up VNC on your Raspberry Pi, it's crucial to ensure your device is correctly configured. This section will guide you through the preliminary setup process, including updating your operating system and establishing a static IP address.
Updating Your Raspberry Pi
To ensure your Raspberry Pi operates smoothly, it's vital to keep your operating system updated. Follow these steps to update your system:
- Open the terminal on your Raspberry Pi.
- Execute the following commands:
sudo apt update
sudo apt upgrade
Installing the VNC Server
The subsequent step involves installing the VNC server on your Raspberry Pi. Raspberry Pi OS comes with RealVNC pre-installed, but you may need to activate it through the configuration menu.
Activating the VNC Server
To activate the VNC server on your Raspberry Pi, adhere to these steps:
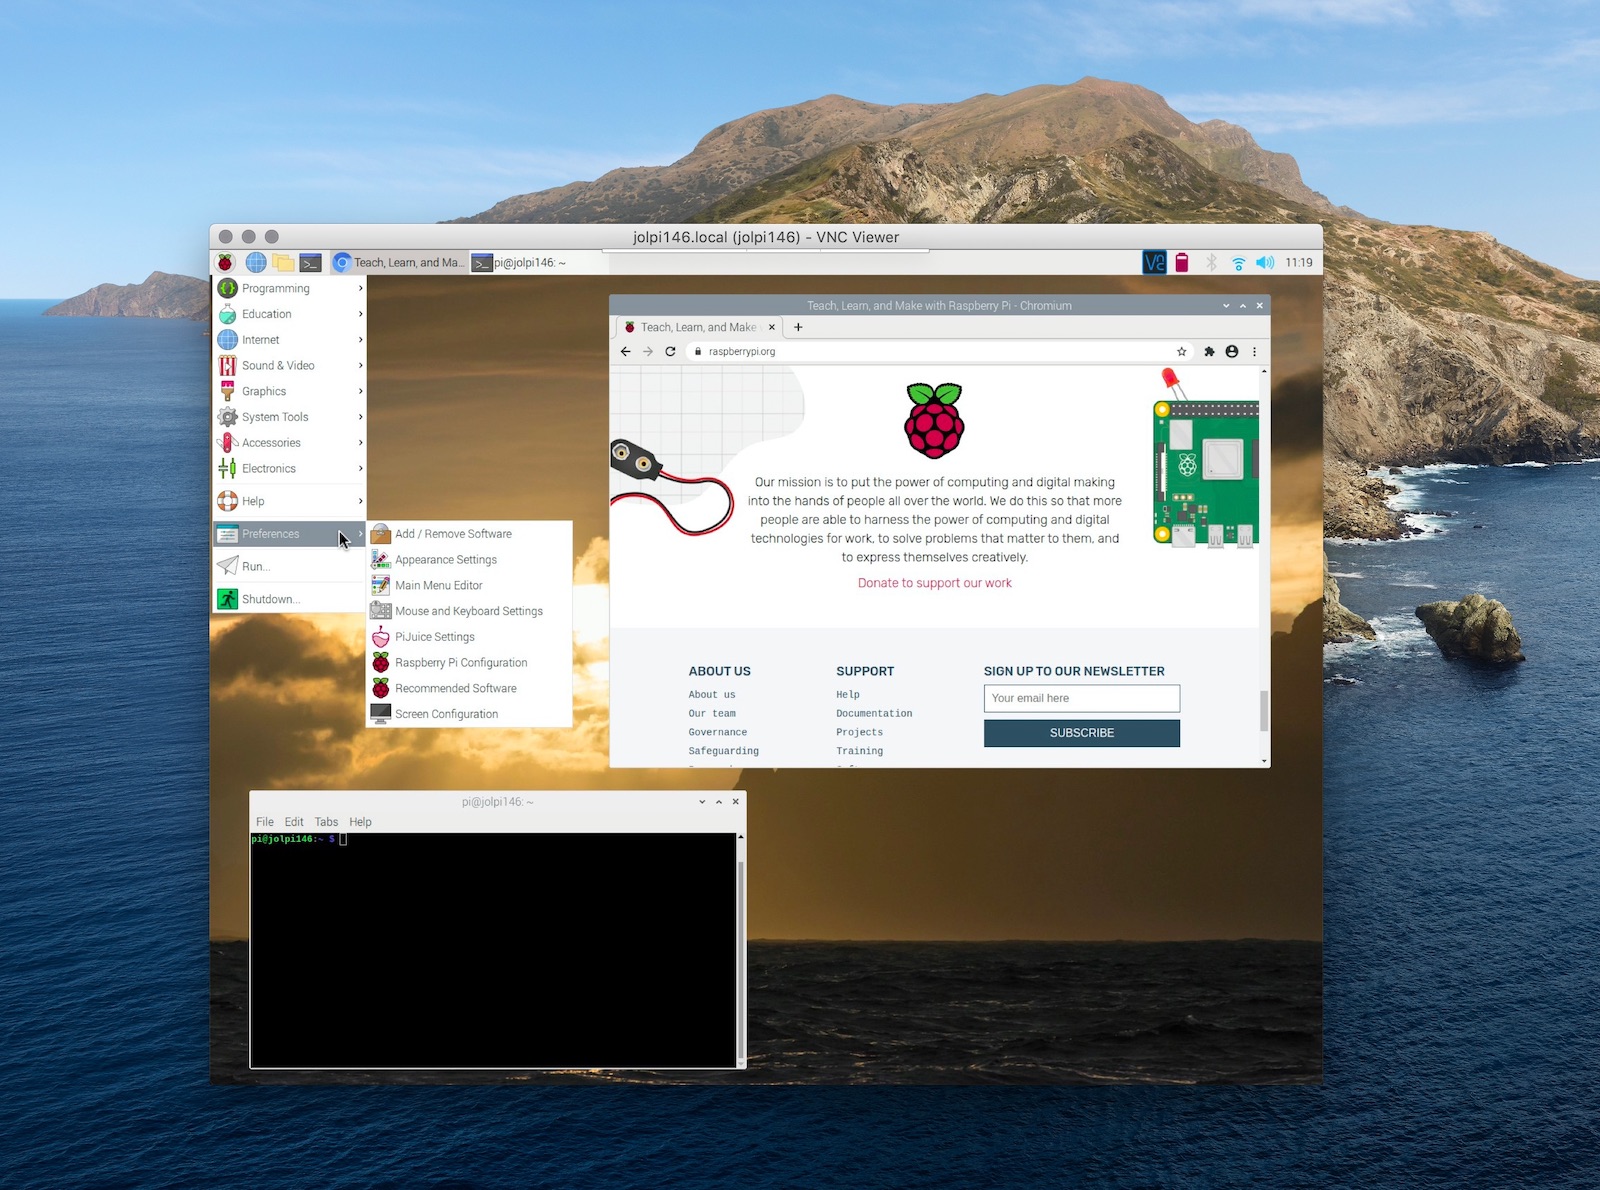
- Open the Raspberry Pi Configuration tool by typing "sudo raspi-config" in the terminal.
- Navigate to "Interfacing Options" and choose "VNC".
- Select "Yes" to activate VNC.
- Reboot your Raspberry Pi to implement the changes.
Configuring the VNC Server
Once the VNC server is installed and activated, you can tailor it to align with your specific needs. This includes setting up user accounts, adjusting resolution settings, and enabling encryption.
Establishing User Accounts
By default, the VNC server permits access to the user account logged in on the Raspberry Pi. However, you can create additional user accounts if required:
- Open the terminal and input "sudo adduser [username]" to create a new user.
- Set a password for the new user and configure additional settings as needed.
Securing Your VNC Connection
Security is an essential component of remote access. Without appropriate safeguards, your Raspberry Pi may be susceptible to unauthorized access. Follow these guidelines to secure your VNC connection:
Implementing SSH Tunneling
SSH tunneling is an effective method to encrypt your VNC connection and shield it from eavesdropping. Here's how to establish it:
- Install an SSH client on your local machine.
- Connect to your Raspberry Pi using SSH and specify the port forwarding options.
- Configure your VNC client to connect via the SSH tunnel.
Connecting to VNC from Anywhere
With the VNC server configured and secured, you can now connect to your Raspberry Pi from anywhere globally. This section will guide you through the process of setting up port forwarding and utilizing a VNC client to establish the connection.
Configuring Port Forwarding
Port forwarding permits external devices to access your Raspberry Pi through your router. Follow these steps to configure port forwarding:
- Log in to your router's administration interface.
- Locate the port forwarding section and add a new rule for VNC (default port is 5900).
- Indicate the internal IP address of your Raspberry Pi.
Resolving Common Issues
Even with meticulous setup, challenges can arise when configuring VNC. This section will tackle some prevalent problems and offer solutions:
Connection Refused Error
If you encounter a "connection refused" error, verify the following:
- Ensure the VNC server is operational on your Raspberry Pi.
- Confirm that port forwarding is correctly configured on your router.
- Examine your firewall settings to ensure they are not obstructing the VNC port.
Improving VNC Performance
To ensure a seamless VNC experience, especially over slower internet connections, consider the following optimizations:
Tailoring Resolution Settings
Lowering the screen resolution can enhance performance by minimizing the amount of data transmitted:
- Access the VNC server settings on your Raspberry Pi.
- Select a lower resolution option that fits your requirements.
Exploring VNC Alternatives
While VNC is a potent tool, there are alternative remote access solutions worth exploring:
TeamViewer
TeamViewer is a widely-used remote access tool offering a user-friendly interface and robust security features. It supports multiple platforms and can be effortlessly installed on Raspberry Pi.
Conclusion and Next Steps
Connecting to Raspberry Pi VNC from anywhere is a valuable skill that can enhance your productivity and broaden the scope of your projects. By following the steps outlined in this guide, you can establish a secure and efficient VNC connection, allowing you to access your Raspberry Pi from virtually any location.
We encourage you to experiment with different configurations and explore alternative solutions to identify the setup that best fits your needs. Don't hesitate to share your experiences and insights in the comments section below. For more articles on Raspberry Pi and related technologies, be sure to explore our website further.
Thank you for reading, and happy tinkering!


Detail Author:
- Name : Mrs. Alysson Maggio
- Username : frank.rosenbaum
- Email : bergstrom.euna@gmail.com
- Birthdate : 1992-03-20
- Address : 643 Elissa Ford Port Nicholastown, IL 02370
- Phone : 1-414-202-7685
- Company : Moore-Brown
- Job : Forming Machine Operator
- Bio : Quis sed qui consequatur quidem quisquam quam consectetur omnis. Qui accusamus tempora quos quos rem illum eius. Illo atque dolore est. Enim cupiditate molestias itaque impedit delectus fuga.
Socials
tiktok:
- url : https://tiktok.com/@rueckera
- username : rueckera
- bio : Vitae qui et id asperiores adipisci velit soluta possimus.
- followers : 5130
- following : 2003
linkedin:
- url : https://linkedin.com/in/amos_real
- username : amos_real
- bio : Qui aut soluta reiciendis quaerat et dolor.
- followers : 998
- following : 2122
instagram:
- url : https://instagram.com/ruecker2016
- username : ruecker2016
- bio : Ab cum et sed repudiandae consectetur. Consectetur iure nulla pariatur aliquid enim et aut.
- followers : 1263
- following : 1603
facebook:
- url : https://facebook.com/amos_official
- username : amos_official
- bio : Quia consequatur ipsa provident voluptatem libero dolorem explicabo.
- followers : 4576
- following : 216
