Addressing a significant hole in your wall might seem intimidating, but with the right approach and tools, you can restore it to its original state effortlessly. Whether the damage resulted from an accidental impact, natural wear and tear, or structural issues, repairing a large wall hole is a feasible DIY task. Learning how to mend damaged walls not only helps you save money but also ensures your home retains its visual appeal and structural integrity.
Repairing a large hole in the wall involves multiple steps, ranging from evaluating the damage to adding the final touches. This guide will walk you through every aspect of fixing extensive wall damage, ensuring your walls look pristine once again. Regardless of your experience level, this process can be completed confidently.
By the end of this article, you'll have a thorough understanding of how to fix a large hole in the wall, complete with practical advice, techniques, and best practices to achieve results that rival professional work. Let's explore the details and get started!
- Hud Unit
- What Is Ozempic Face Before And After
- Beard Growth Oil Does It Work
- Mastiff Mix Dogs
- How Do I Order Checks From Chase
Table of Contents
- Evaluating the Extent of Damage
- Essential Tools and Materials
- Preparing the Wall for Repair
- Patching the Hole
- Applying Spackle
- Sanding and Finalizing the Repair
- Painting the Repaired Area
- Avoiding Common Pitfalls
- Expert Tips for Success
- Conclusion
Evaluating the Extent of Damage
Before you initiate the repair process, it's critical to assess the full scope of the damage. Understanding the size and depth of the hole will guide you in determining the most effective repair strategy. For instance, holes larger than two inches may necessitate reinforcements, such as a backing board or mesh patch, to ensure stability.
Steps to Evaluate the Damage
- Measure the hole's dimensions, including its width, height, and depth, to determine the extent of the damage.
- Inspect the surrounding area for loose or weakened drywall that may also require attention.
- Look for underlying issues, such as water damage or structural concerns, which could impact the repair process.
A thorough evaluation ensures that all aspects of the repair are addressed effectively. If the hole is caused by water damage or mold, consulting a professional beforehand is highly recommended to prevent further complications.
Essential Tools and Materials
Having the right tools and materials at your disposal is crucial for a successful wall repair. Below is a comprehensive list of items you'll need:
- Charlieheen Ashton Kutcher
- Theaters Inalinas Ca
- Connecticut Department Of Motor Vehicles Norwalk
- Outlet Centermithfield Nc
- How Old Jack Black
- Drywall saw or utility knife
- Sandpaper or sanding block
- Spackle or joint compound
- Drywall patch or mesh tape
- Putty knife or drywall taping knife
- Paint and primer
Depending on the size of the hole, you may also require additional materials, such as a backing board or drywall screws. Ensure all tools are in good condition and that the materials you choose are compatible with your wall type for optimal results.
Preparing the Wall for Repair
Proper preparation is vital to achieving a seamless repair. Begin by clearing the area around the hole and removing any loose debris. If the hole has irregular edges, use a utility knife to smooth them, creating a clean, rectangular outline. This step simplifies the application of patches and ensures a smooth finish.
Steps to Prepare the Wall
- Clean the area surrounding the hole thoroughly to remove dust and debris.
- Trim any protruding drywall or plaster using a utility knife for a clean edge.
- Protect adjacent surfaces with drop cloths or painter's tape to prevent accidental damage during the repair process.
Preparation is a foundational step that ensures the repair process runs smoothly and minimizes the risk of additional damage. Taking the time to prepare the wall correctly is essential for achieving professional-quality results.
Patching the Hole
Once the wall is prepared, it's time to patch the hole. For smaller holes, a drywall patch or mesh tape may suffice. However, larger holes often require a backing board for added support. This involves cutting a piece of drywall to fit the hole and securing it with screws or adhesive.
Steps to Patch the Hole
- Cut a piece of drywall slightly larger than the hole to ensure a snug fit.
- Secure the patch in place using drywall screws or adhesive for stability.
- Apply mesh tape around the edges of the patch to reinforce the repair and prevent future cracking.
Patching the hole is a pivotal step in the repair process. Ensure the patch is securely attached and aligned with the surrounding wall surface for the best results.
Applying Spackle
After patching the hole, apply spackle or joint compound to create a smooth surface. Use a putty knife or drywall taping knife to spread the compound evenly across the patched area. Begin with a thin layer and allow it to dry completely before adding additional coats.
Tips for Applying Spackle
- Work in thin layers to avoid cracking or unevenness, ensuring a smooth finish.
- Feather the edges of the spackle to blend it seamlessly with the surrounding wall.
- Allow each layer to dry thoroughly before sanding or applying the next coat for the best results.
Applying spackle requires patience and meticulous attention to detail. Applying multiple thin layers ensures a polished and professional appearance.
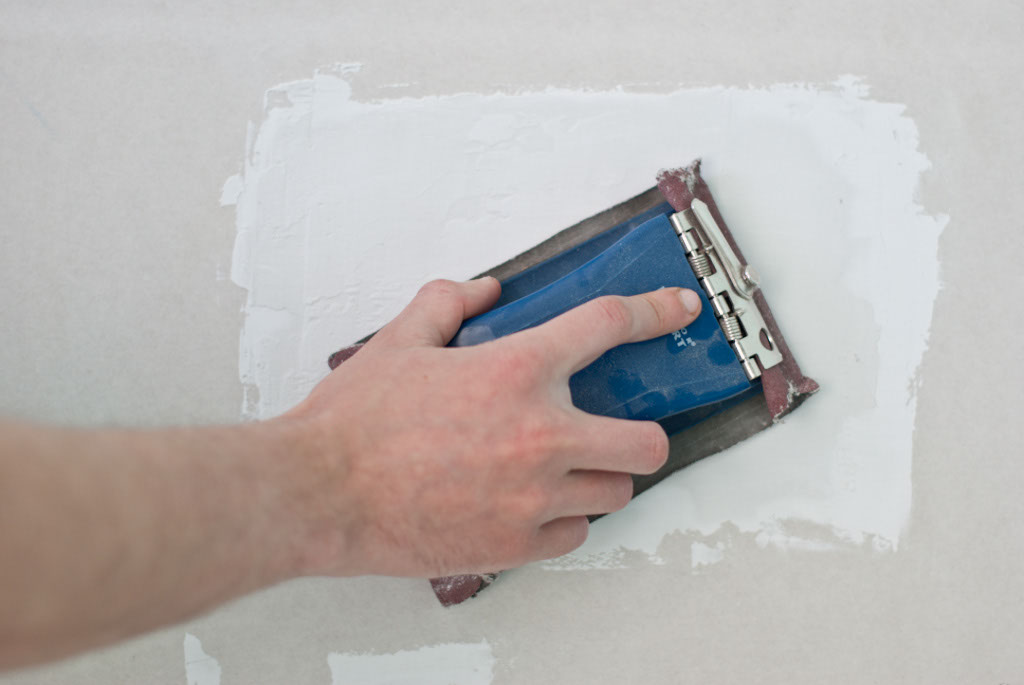
Sanding and Finalizing the Repair
Once the spackle has dried, it's time to sand the repaired area. Use fine-grit sandpaper or a sanding block to smooth out the surface, eliminating any ridges or imperfections. Be cautious not to sand too aggressively, as this could damage the surrounding wall.
Sanding Tips
- Start with light pressure and gradually increase as needed to achieve the desired smoothness.
- Regularly wipe away dust to monitor your progress and ensure a flawless finish.
- Ensure the repaired area is level with the surrounding wall surface for a seamless blend.
Sanding is the final step before painting and is crucial for achieving a perfect finish. A well-sanded surface ensures the repaired area blends harmoniously with the rest of the wall.
Painting the Repaired Area
With the repaired area sanded and smooth, it's time to paint. Begin by applying a primer to the patched area to ensure proper adhesion and an accurate color match. Once the primer is dry, use a paintbrush or roller to apply the same paint used on the wall, blending it carefully with the surrounding surface.
Painting Tips
- Test the paint on a small, inconspicuous area first to ensure an exact match.
- Apply thin, even coats to avoid streaks or uneven application.
- Use a feathering technique to seamlessly blend the paint with the surrounding wall.
Painting the repaired area completes the process, leaving your wall looking pristine and restored. A well-matched paint job ensures the repair is virtually unnoticeable.
Avoiding Common Pitfalls
While repairing a large hole in the wall may appear straightforward, certain mistakes can compromise the quality of your repair. Below are some common errors to avoid:
- Failing to thoroughly assess the damage before beginning the repair process.
- Using excessive spackle or applying it too thickly, leading to unevenness.
- Sanding too aggressively, which can damage the surrounding wall.
- Skipping the priming step, resulting in poor paint adhesion and color mismatch.
Avoiding these mistakes ensures your repair is successful and long-lasting. Taking the time to do the job correctly from the start saves both time and effort in the future.
Expert Tips for Success
To achieve professional-quality results when fixing a large hole in the wall, consider the following tips and techniques:
- Invest in high-quality materials and tools for superior results and durability.
- Work in a well-ventilated space to avoid inhaling dust or harmful fumes during the process.
- Take regular breaks to maintain focus and prevent fatigue, ensuring precision in your work.
- Seek advice from experienced professionals if you're uncertain about any step of the process.
Incorporating these tips and techniques into your repair process can significantly enhance the quality of your work. With practice and patience, you can master the art of wall repair and approach similar projects with confidence.
Conclusion
Repairing a large hole in the wall is a manageable DIY project that can save you money while enhancing your home's appearance. By following the steps outlined in this guide, you can achieve professional-quality results with minimal effort. Remember to carefully assess the damage, use the right tools and materials, and take your time to ensure a flawless finish.
We invite you to share your experiences and tips in the comments below. If you found this article helpful, consider sharing it with others who might benefit from the information. For more home improvement ideas and advice, explore our other articles and resources. Happy repairing!


Detail Author:
- Name : Sheila O'Conner
- Username : fkozey
- Email : jhyatt@senger.com
- Birthdate : 2006-10-21
- Address : 170 Wilber Courts New Thaddeus, IL 00737
- Phone : 640-581-5921
- Company : Wyman and Sons
- Job : Order Filler OR Stock Clerk
- Bio : Necessitatibus sed reprehenderit dolor tempora enim dolorem enim. Veniam aut voluptas qui error accusamus qui ullam. Ab quas rem ad perspiciatis beatae aut vel.
Socials
instagram:
- url : https://instagram.com/cschumm
- username : cschumm
- bio : Est dolor et ex et vel. Commodi voluptatibus labore autem fuga accusamus.
- followers : 3272
- following : 1752
tiktok:
- url : https://tiktok.com/@chris.schumm
- username : chris.schumm
- bio : Corporis adipisci voluptatem et dolorem vero tenetur est.
- followers : 1932
- following : 847
facebook:
- url : https://facebook.com/chris1783
- username : chris1783
- bio : Voluptas sed at et. Error ipsam atque ad qui. Quam a et quisquam consequatur.
- followers : 6827
- following : 1941
twitter:
- url : https://twitter.com/chris6000
- username : chris6000
- bio : Optio excepturi atque nemo dolorem et adipisci accusantium. Non sed repellendus explicabo rerum ipsum.
- followers : 4852
- following : 241
linkedin:
- url : https://linkedin.com/in/chris_xx
- username : chris_xx
- bio : Voluptatem vel ut et.
- followers : 6680
- following : 2991
