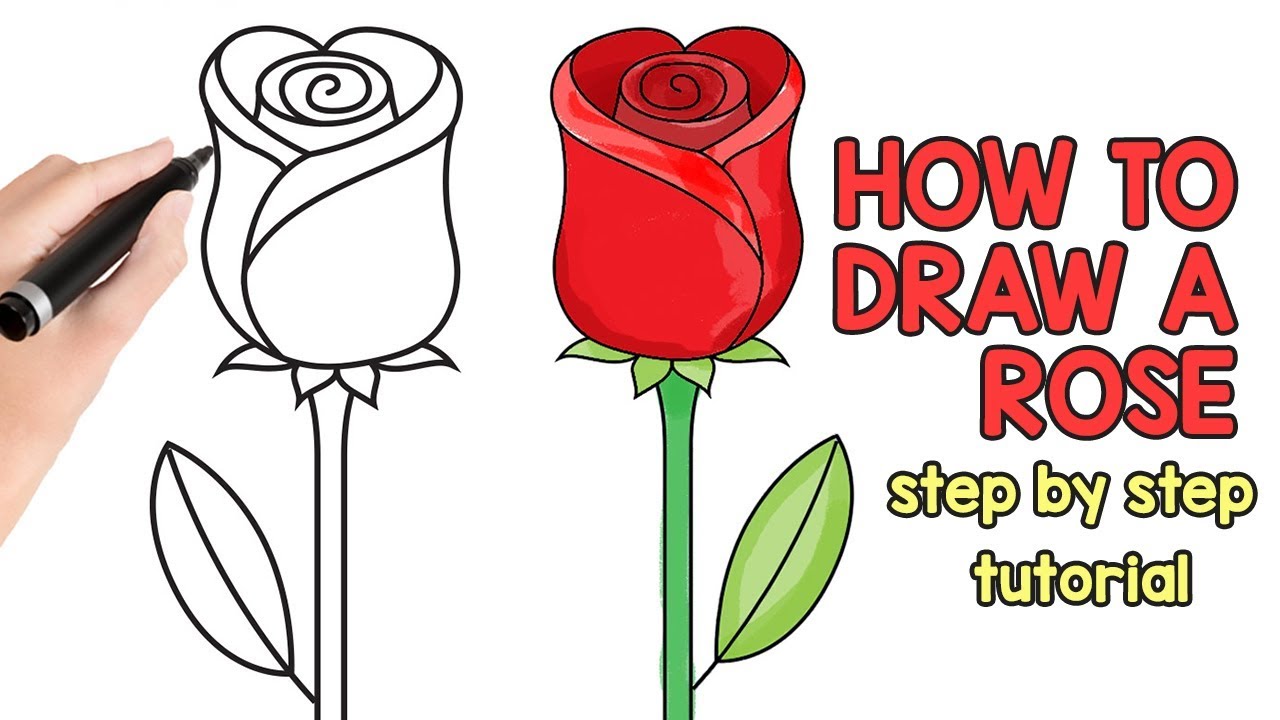
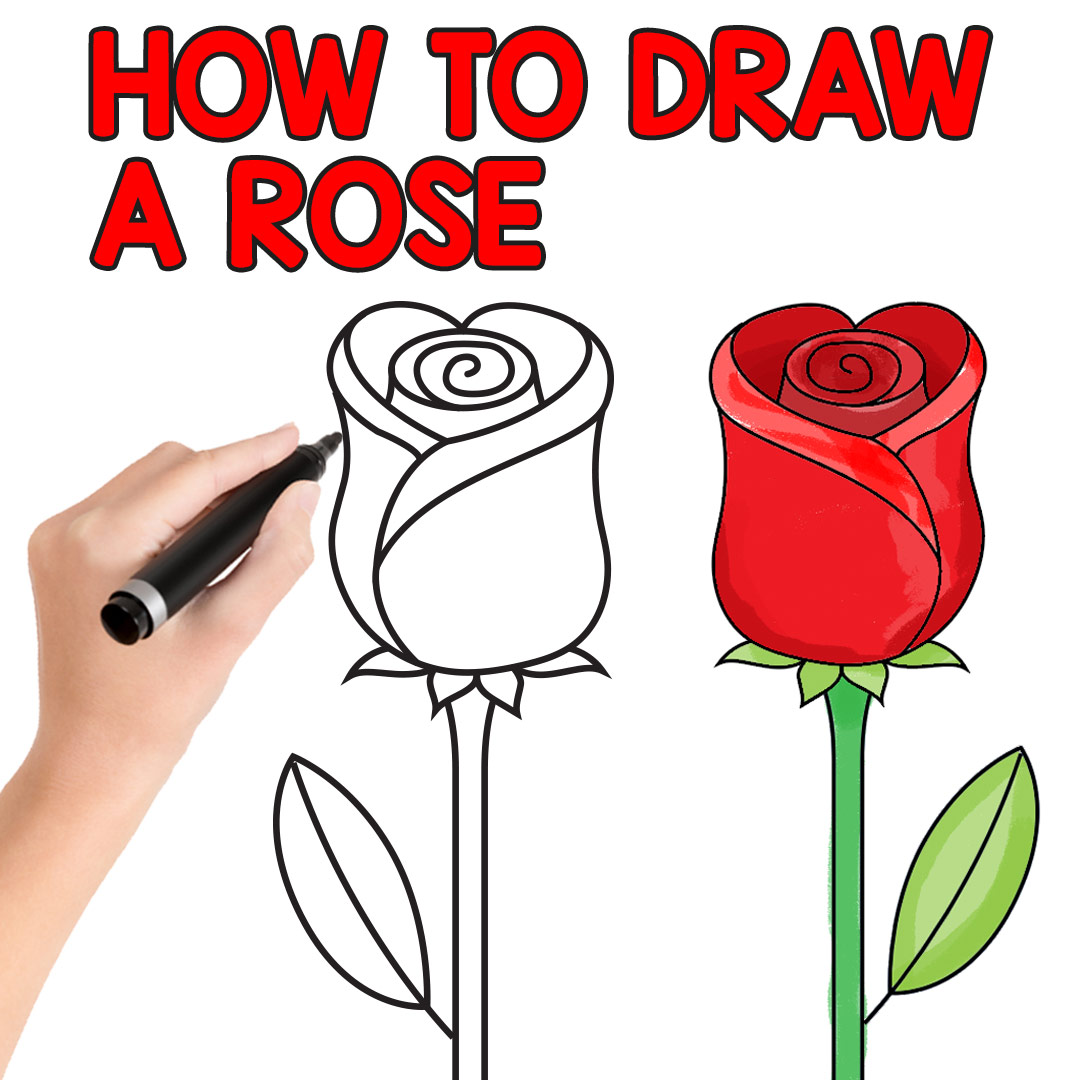
Embarking on the journey of learning how to draw a rose can be an incredibly enriching experience, especially for beginners eager to explore their artistic potential. Whether you're a novice artist or someone just starting out, this comprehensive guide will equip you with the skills to create breathtaking rose illustrations. Through simple steps and effective techniques, the art of drawing roses becomes more accessible and enjoyable than ever before.
Roses have long been celebrated as one of the most iconic subjects in the world of art, owing to their timeless beauty and deep symbolic meanings. From romantic gestures to elegant decorative pieces, roses have inspired countless artists throughout history. This beginner-friendly guide will provide you with all the tools, techniques, and insights necessary to craft stunning rose drawings with ease and confidence.
Throughout this article, we will delve into a wide range of topics, from fundamental shapes and shading techniques to advanced tips that will take your artwork to the next level. By following our detailed, step-by-step instructions, you'll not only enhance your drawing abilities but also produce results that are both impressive and personally fulfilling. So, gather your materials—pencil, paper, and perhaps a bit of inspiration—and let's embark on this artistic adventure together!
Table of Contents
- Exploring the World of Rose Drawing
- Essential Tools and Materials for Drawing Roses
- Understanding Basic Shapes in Rose Illustration
- A Comprehensive Step-by-Step Guide to Drawing a Rose
- Mastering Shading Techniques for Realistic Roses
- Avoiding Common Mistakes in Rose Art
- Exploring Different Variations and Styles of Rose Drawings
- Advanced Tips for Creating Stunning Rose Art
- The Art of Digital Rose Drawing
- Conclusion and Next Steps
Exploring the World of Rose Drawing
While the idea of drawing a rose might initially seem daunting, the right approach can make it an accessible and enjoyable experience for artists of all levels. Roses, with their inherent beauty and versatility, serve as an ideal subject for various artistic expressions. Whether you lean toward realistic depictions or prefer to explore abstract interpretations, roses offer endless opportunities for creativity and skill development.
Why Choose Roses as Your Artistic Subject?
For centuries, roses have symbolized love, beauty, and passion, making them a recurring theme in renowned artworks, literature, and music. By learning how to draw a rose, you are not only connecting with a rich artistic heritage but also honing your skills in shading, texture, and form—essential components for any aspiring artist. Roses provide an excellent platform for practicing these techniques while allowing you to express your unique artistic voice.
Essential Tools and Materials for Drawing Roses
Before you begin your drawing journey, it's crucial to gather the right tools and materials. Having the appropriate supplies will enhance your experience, making it smoother and more enjoyable. Below is a list of essential items you'll need to get started:
- Pencils in varying grades (HB, 2B, 4B, 6B)
- Eraser options, including kneaded and regular erasers
- A high-quality sketchbook or drawing paper
- Blending tools, such as tortillons or blending stumps
- Reference images of roses for guidance and inspiration
For those interested in exploring digital art, tools like a graphics tablet and software programs such as Procreate or Adobe Fresco can greatly expand your creative possibilities. These digital platforms allow for experimentation with diverse techniques and styles without the constraints of traditional media.
Understanding Basic Shapes in Rose Illustration
Gaining a solid understanding of basic shapes is fundamental when learning to draw a rose. By simplifying the intricate structure of a rose into more manageable forms, you can approach the drawing process with greater confidence and precision. Start by sketching an oval for the flower's center and gradually add petals using curved lines to create a harmonious composition.
Breaking Down the Structure of a Rose
Here's a concise breakdown of the key components of a rose's structure:
- Oval for the central bud
- Petals resembling teardrops or rounded triangles
- Leaves with pointed tips
- A stem adorned with thorns
By focusing on these basic shapes and studying real roses or reference images, you'll gain a clearer understanding of how petals layer and overlap, enabling you to construct a more realistic and visually appealing rose.
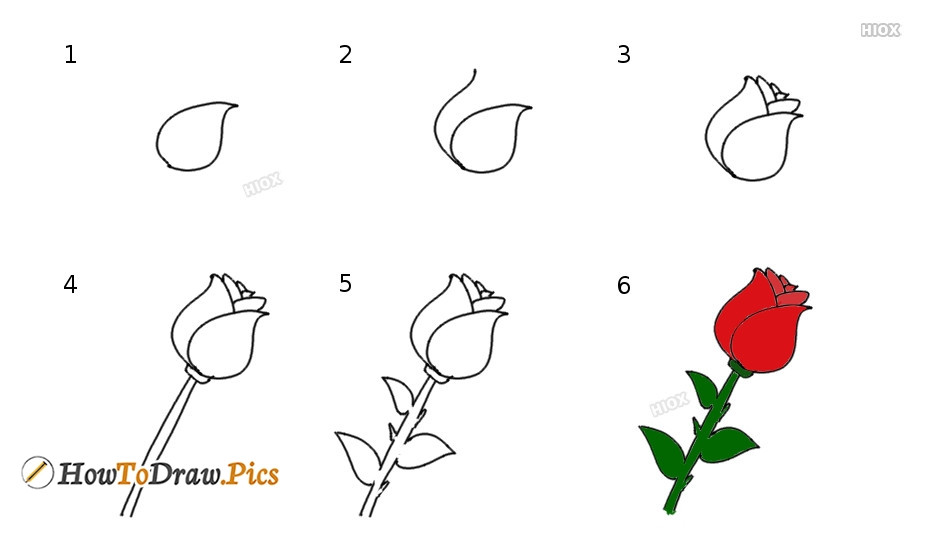
A Comprehensive Step-by-Step Guide to Drawing a Rose
With your materials ready and a solid grasp of basic shapes, let's dive into the detailed process of drawing a rose. This step-by-step guide will walk you through each stage, ensuring you achieve results that are both beautiful and satisfying.
Step 1: Sketching the Center
Begin by lightly sketching an oval to represent the center of the rose. This foundational shape will serve as the starting point for your entire drawing. Use gentle, light strokes so that any initial lines can be easily erased or adjusted later.
Step 2: Adding the Inner Petals
Next, draw small, curved lines around the oval to depict the inner petals. These petals should be closely packed and slightly overlapping, mimicking the natural arrangement found in real roses.
Step 3: Layering the Outer Petals
Gradually add larger petals around the inner ones, ensuring they overlap in a natural and organic manner. Refer to your reference images to observe how petals curve and layer in actual roses, allowing you to replicate these details in your drawing.
Step 4: Drawing the Stem and Leaves
Once the flower is complete, sketch the stem and leaves. Incorporate thorns along the stem for added detail and authenticity. Pay close attention to the shape and texture of the leaves, as these elements contribute significantly to the overall realism of your artwork.
Mastering Shading Techniques for Realistic Roses
Shading plays a pivotal role in adding depth and dimension to your rose drawing. By mastering various shading techniques, you can transform a flat image into a lifelike masterpiece that captures the viewer's attention.
Types of Shading Techniques
- Hatching: Parallel lines drawn closely together to create tone
- Cross-hatching: Crossing lines to produce darker and more complex shading
- Stippling: Small dots strategically placed to build up tone and texture
- Blending: Using tools or fingers to smooth out shading for a seamless finish
Feel free to experiment with these techniques to discover which ones align best with your artistic style. Always consider the light source and shadow placement in your reference images to ensure your shading is both realistic and effective.
Avoiding Common Mistakes in Rose Art
Even seasoned artists encounter challenges along their creative journey, but being aware of common pitfalls can help you refine your rose drawings. Below are some mistakes to be mindful of:
- Overdrawing: Applying excessive pressure or adding too many intricate details
- Ignoring Proportions: Ensuring the petals, stem, and leaves are proportionate to one another
- Forgetting Shadows: Incorporating shading to create depth and enhance realism
By steering clear of these common mistakes, you'll produce drawings that are cleaner, more polished, and visually captivating.
Exploring Different Variations and Styles of Rose Drawings
Rose drawings can take on a multitude of forms, ranging from hyper-realistic to whimsically abstract. Exploring diverse styles will help you discover your unique artistic identity. Consider the following variations:
- Realistic: Focus on precise details and lifelike shading
- Abstract: Experiment with unconventional shapes and vibrant colors
- Line Art: Create bold, clean lines without the inclusion of shading
Feel free to blend and combine these styles to craft something entirely original and reflective of your personal artistic vision.
Advanced Tips for Creating Stunning Rose Art
Once you've mastered the fundamentals, it's time to elevate your rose drawings to new heights. Below are some advanced tips to refine and enhance your artwork:
- Study Anatomy: Gain a deeper understanding of how roses grow and bloom
- Experiment with Mediums: Explore the use of colored pencils, watercolors, or digital tools
- Practice Regularly: Consistent practice is key to improving your skills over time
Incorporating these advanced tips into your routine will enable you to produce rose art that is not only stunning but also uniquely your own.
The Art of Digital Rose Drawing
Digital drawing has revolutionized the artistic landscape, offering artists a wealth of new tools and possibilities. If you're intrigued by the prospect of creating rose illustrations digitally, here are some pointers to help you get started:
Software and Tablets
Some of the most popular software options for digital drawing include:
- Procreate (ideal for iPad users)
- Adobe Fresco
- Clip Studio Paint
Pair these programs with a high-quality graphics tablet, such as the Wacom Intuos or iPad Pro, for optimal results and a seamless digital drawing experience.
Conclusion and Next Steps
Learning how to draw a rose can be an immensely rewarding journey for any beginner. By following this guide, you've acquired the knowledge and skills necessary to create breathtaking rose illustrations. Remember to practice consistently, experiment with different styles, and always strive for improvement. Art is a journey, and each step you take brings you closer to achieving your creative goals.
We encourage you to share your rose drawings with the world. Leave a comment below to showcase your progress or ask any questions you may have. Additionally, explore other articles on our site for further artistic inspiration and guidance. Happy drawing, and may your artistic endeavors flourish like the roses you create!
Detail Author:
- Name : Emilia Graham MD
- Username : jamaal61
- Email : carey.boehm@pagac.org
- Birthdate : 2003-05-18
- Address : 32069 Hegmann Fort Suite 203 West Shanel, SD 40834-6772
- Phone : 475-949-2364
- Company : Hermann-Becker
- Job : Watch Repairer
- Bio : Voluptatem repellendus similique vero distinctio esse nemo nihil. Quo dolor provident impedit non aliquid et. Et nulla iusto non neque saepe voluptatem.
Socials
instagram:
- url : https://instagram.com/esther_cummerata
- username : esther_cummerata
- bio : Error adipisci ut cumque natus consequatur. Id omnis et sint. Earum nisi id repellat dolores.
- followers : 3897
- following : 190
tiktok:
- url : https://tiktok.com/@esther.cummerata
- username : esther.cummerata
- bio : Doloribus amet doloremque sapiente voluptatem ipsa dolores exercitationem.
- followers : 6333
- following : 1037
facebook:
- url : https://facebook.com/ecummerata
- username : ecummerata
- bio : Quia molestias aut labore laborum qui qui cumque ipsa.
- followers : 4391
- following : 1000
